Showing posts with label recipe. Show all posts

05 November 2015

Candy Bar Brownies

0 remarks

Anymore, it seems like the marketing corporations of the world want to find ways to make people buy candy for your kids.  Sure, Halloween was always the huge candy free-for-all that left you with a heaping bag of sugar and chocolate.  But then, Christmas is just around the corner, with stockings stuffed full of sugar and chocolate.  And isn't Valentine's Day just for your sweetheart?  Not anymore!  Get those kids some cardboard hearts stuffed with more sugar and chocolate!  Of course, then we have Easter, with baskets overflowing with sugar and chocolate bunnies.  We get some relief in the summer, but how long will it be before we have Independence Day fireworks exploding with sugar and chocolate for the masses?

We never seem to recover from Halloween, as soon as we put a small dent in the candy stockpile, Christmas strikes, and we just add fuel to the fire.  The process continues over and over as each candy holiday barrels through.  We have taken to just buying our kids a few fun specialty candy trinkets because we know they'll get more than enough from the grandparents, aunts, uncles, and school friends.

I know this may sound like I'm complaining, but I'm not.  I am so grateful that I have family and friends around to shower my kids with love and candy, I really am.  I honestly don't want to see it end.  So when life throws you buckets of candy, make candy bar brownies!!  Better yet, make candy bar brownies and take them to a party, so other people can help eat your stash.

I ran into this situation a couple years ago when we were invited to a friends house and I offered to make dessert.  I looked at my mammoth Tupperware thatsa mega bowl filled to the brim with candy and thought maybe I should just take some fun sized candy treats to share.  That's not really my style, so I tried to think of a vessel to use to pawn my candy off on my unsuspecting friends, and then it hit me....BROWNIES!

I killed two birds with one stone with these deliciously rich chocolaty treats, and I have made them the past couple years from out Halloween hoard.  The recipe calls for just chocolate-coated caramel-peanut nougat bars, aka Snickers, and plain old milk chocolate bars, but I have been known to throw in some M&M's, Milky Way, 3 Musketeers, Mr. Goodbar, Reese's Peanut Butter Cups, and Baby Ruth.  I think it's fun to add variety because then you can guess which bars are in the brownie piece you eat.  I stay away from Twix and Kit-Kats because those don't really translate well to being crushed and baked.  I would also suggest not using Skittles.

These brownies are a lot of fun.  They are a kind of whimsical way to enjoy Halloween candy, and they are so much fun to share with friends.  Just make sure you have a glass of milk nearby. 

Candy Bar Brownies

Ingredients
4 large eggs, lightly beaten 
2 cups sugar 
3/4 cup butter, melted 
2 teaspoons vanilla extract 
1 1/2 cups all-purpose flour 
1/2 teaspoon baking powder 
1/4 teaspoon salt 
1/3 cup cocoa
8.5 ounces chocolate-coated caramel-peanut nougat bars, chopped
4.4 ounces milk chocolate bars, chopped


Directions
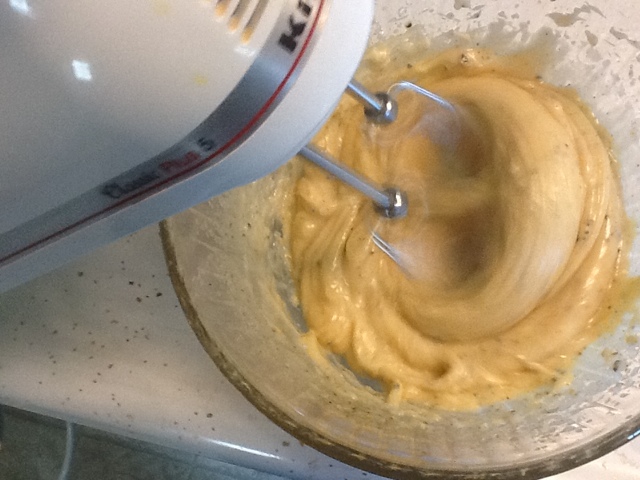
Add the eggs, sugar, butter, and vanilla in a large mixing bowl and whisk to combine.

Add the flour, baking powder and salt into the egg mixture and stir until just combined. Then, fold in the chopped nougat bars and chopped milk chocolate bars.

Spoon mixture into a greased and floured 13 x 9inch baking dish.

Bake at 350° for 30 minutes. Cool and cut into squares.
 

26 October 2015

Snickerdoodle Pie

0 remarks

Snickerdoodles.  I have posted about them here on latent chestnut and on Family Tree-Eats.  They are one of my favorite cookies, and Emilie's personal favorite.  The other day, Em and I were making fresh pasta, and she kept talking about wanting to make a pie with the pasta dough.  I told her that the dough was completely different and that we would make a pie another time.  Though, I must say that the rolled pasta sheets do look similar to pie crust.

She wouldn't let it go and kept talking about making a pie.  I kept telling her we would do it another day.  Out of the blue, she said, "Can we make a snickerdoodle pie?"  That question perked my ears up in a hurry.  I had never heard of a snickerdoodle pie, and this sounded like to perfect time to dream one up.  We had a few errands to run, so she sat in the backseat with a pen and paper and I started listing off some ingredients for her to write down.  Before we knew it, we had the makings of a snickerdoodle pie.

As soon as we got home, we made a pie crust and put it in the refrigerator to cool before rolling it out.  Then we got to work on making the filling. I must have channeled my grandma's buttermilk pie recipe when Emilie and I were thinking of ingredients, because these pies are very similar.  Perhaps because I thought buttermilk would be the perfect component to a snickerdoodle inspired pie, because of it's tang.  But what gives snickerdoodles that bit of tang, I wondered?

When I think of snickerdoodles, I think of a cookie that is soft and chewy on the inside, delightfully crispy on the edges.  I think of the warm spiciness of the cinnamon and the use of cream of tartar in the recipe.  Dare I add cream of tartar to the pie?  What does it even do?  Does it even have it's own flavor?  I needed answers!

I went straight to the source and popped open my jar of cream of tartar and tasted it all by itself.  It was quite tangy and acidic.  Which makes sense because my snickerdoodles have a bit of tang that is balanced out by the sugar and cinnamon.  Cream of tartar also acts as a stabilizer, so I thought that it couldn't hurt to add some to our new pie creation.  I think it is just as much a part of snickerdoodles as the cinnamon and sugar coating.

The pie filling came together like nothing, especially since Emilie did it all by herself while I was rolling out the pie crust.  I just gave it a final whisking at the end to make sure all the ingredients were thoroughly integrated.  To replicate the cinnamon sugar coating on the traditional cookie, we mixed some cinnamon and sugar together and rubbed it in to the empty pie shell.  Then, with about 20 left in the cooking process, we dusted the top of the pie with more cinnamon and sugar.

The pie had the look of a snickerdoodle, but it was now time for the moment of truth...tasting and judgment!  Upon removing the first slice of pie, I breathed a sigh of relief because the filling had set up beautifully.  It was nice and creamy, and just looked delicious.  After taking the first bite, my eyes lit up and I knew we had something special.

This pie is creamy, tangy, sweet and cinnamon-ny.  The pie crust and the cinnamon and sugar topping add a nice texture, that is ever so reminiscent of a snickerdoodle.  The tang from the buttermilk and cream of tartar are balanced by the sugar to create a truly unique pie.  This one is a keeper!

Just out of curiosity, I did an internet search for snickerdoodle pie and found the options very limited. So, not only is this pie incredibly satisfying and delicious, I think it is pretty unique, too.  To think, it probably wouldn't have happened if Emilie didn't want to make a pie with pasta dough...


Snickerdoodle Pie
Ingredients
2 eggs
1 1/4 cups sugar
1/2 stick melted butter
1/4 cup flour
1/2 teaspoon cream of tartar
1 cup buttermilk

1 9 inch pie crust (preferably homemade)

1 teaspoons ground cinnamon
3 tablespoons sugar

Directions
Preheat oven to 450 degrees F.

In a large bowl, whisk together the eggs, 1 1/4 cups of sugar, melted butter, flour, cream of tartar, and buttermilk until thoroughly combined.

In a small bowl or cup, mix together the cinnamon and 3 tablespoons of sugar.

Take half of the cinnamon sugar mixture and rub onto the top of the empty pie crust.  Then, pour the filling into the pie crust and bake at 450 degrees for 10 minutes.   Reduce the oven temperature to 300 degrees and bake for another 10 minutes. 

Then, pull out the oven rack or take the pie out of the oven and top with the remaining cinnamon and sugar mixture.  Return the pie to the 300 degree oven and continue to bake for 20 to 25 minutes or until the filling barely jiggles when moved. Cool completely before serving.

07 October 2013

Mac and Cheese Toast

0 remarks
 
Leftover mac and cheese?  Fry it up!  I have wanted to make this since I first saw the Good Eats episode air back in 2002.  Well, here we are in 2013 and I finally got around to it.  Let me tell you, I should have tried it sooner and I am tempted to make some mac and cheese just to cube it up and fry it the next day.
 
Mac and Cheese Toast
An Alton Brown application
Printable recipe

Ingredients
Leftover baked macaroni and cheese, refrigerated for at least overnight
1 cup all-purpose flour
1 teaspoon salt
1 teaspoon pepper
1 egg beaten with 2 ounces water
1 cup panko bread crumbs
Oil for deep frying, preheated to 375 degrees

Directions
Cut refrigerated macaroni and cheese into bite size pieces, about 1.5 inches. Season the flour with salt and pepper. Dredge each piece through the flour and tap off excess. Dip in the egg mixture and then coat with the panko bread crumbs. Rest the cubes for 5 minutes so the crust can set. Carefully drop into the oil and fry until golden brown, 3-4 minutes. Remove to a cooling rack and rest for 2 minutes before serving.

25 July 2013

Homemade Mayonnaise

0 remarks
I realize I have posted about making my own mayo before, but I failed to post a recipe.  What can I say?  I was young.  Back then, I had a bad habit of posting about the food I made without including a full recipe.  Well, I am now here to rectify myself. 

Mayonnaise is very simple to make, and I almost always have all the ingredients in my pantry.  It is quite versatile, too, as the seasonings can be adjusted to make it fit whatever you're wanting to make.  I have used this basic method to make coleslaw dressing and to give a more Italian flair to my pasta salad.  No matter what you're making it for, it's all about building an emulsion.


For this batch, the seasonings I used were salt, pepper, celery seed, garlic powder, paprika and sugar.  Start out by mixing together the yolk and dry ingredients, and then add the vinegar.  I have moved on from a whisk to a hand mixer, mainly because I was never able to whisk vigorously while slowly drizzling the oil into the yolk.


Once that mixture is combined, start adding the oil a few drops at a time until the mixture starts to thicken.  There's your emulsion!


At this point, you can increase the flow of oil slightly, though still slow, and continue mixing until all the oil is incorporated.


There you have it!  Homemade mayo!  Leave at room temperature for an hour and then keep in the refrigerator for up to a week. 

Mayonnaise

Ingredients
1 egg yolk
1 teaspoon kosher salt
1/2 teaspoon ground black pepper
1/2 teaspoon garlic powder
1/2 teaspoon celery seed
1 pinch paprika
2 pinches sugar
1 tablespoon white wine vinegar
1 cup oil

Directions
Whisk together egg yolk and dry ingredients.  Then mix vinegar into the yolk mixture. Continue to mix and start adding the oil a few drops at a time until the liquid seems to thicken and lighten.  Once you have formed the emulsion, increase the oil flow to a constant, thin stream. Continue mixing until all of the oil is incorporated. Leave at room temperature for 1 hour then refrigerate for up to 1 week.

05 February 2013

Alton Brown's Fried Chicken

0 remarks


Fried chicken is hard to get right, at least in my experience.  I don't remember the first time I attempted Alton Brown's fried chicken, but the Good Eats episode that featured the recipe, "Fry Hard II: The Chicken", first aired on April 25, 2001.  I imagine that I tried to make it shortly after, since I was trying just about every new Alton Brown application back then.

The road to success was daunting, and it was the breading that gave me fits.  It was hard to get it just right, and I was inconsistent at best.  Sometimes it would be perfectly crispy, golden brown and delicious.  Other times, the breading would be soggy and greasy, or sometimes almost mealy with too much flour.

The chicken was always delicious, though; tender, juicy and flavorful.  The spices are just right, too.  One teaspoon of cayenne pepper may seem like a lot, but it adds just the right amount of heat.  It really is subtle, because the kids eat it up, too.  So, the struggles I had with the breading was made up for by the chicken itself.  But, when I got the breading right, it really sent it over the top. 

I don't know what led me to try it, but a couple years ago, I finally found the secret to the perfect breading.  A brown paper bag.  By putting the flour and chicken in a brown paper bag and shaking it up, it created a perfect coating of flour on the chicken.

Since I have adopted this method, I get perfect fried chicken every time.

Fried Chicken
Printable Recipe

Ingredients
1 broiler/fryer chicken, cut into 8 pieces
2 cups low fat buttermilk
2 tablespoons kosher salt
2 tablespoons Hungarian paprika
2 teaspoons garlic powder
1 teaspoon cayenne pepper
Flour, for dredging
Vegetable shortening or oil, for frying

Directions
Marinate the chicken pieces in buttermilk and refrigerate for 12 to 24 hours.  Add enough shortening or oil to come 1/3-inch up the side of a 12-inch cast iron skillet. Heat oil to 325 degrees.

Drain chicken in a colander or on wire rack. Combine salt, paprika, garlic powder, and cayenne pepper. Season chicken with this mixture liberally.

Add flour to large paper bag then add all the chicken.  Shake the bag to thoroughly coat the chicken.  Then remove the chicken from the bag and place skin side down into the pan. Put the thighs in the center of the pan, and breast and legs around the edge.

Cook the chicken until golden brown, approximately 10 to 12 minutes per side; the internal temperature should be right around 180 degrees.  Drain chicken on a rack over a sheet pan.

20 December 2011

Chocolate Cookies - Yum! Yum! Yum!

2 remarks

I'm pretty set in my ways when it comes to the cookies I bake for the holidays.  For years, our cookie boxes consisted of the chewy, snickerdoodles, and spritz.  Not a big variety, but some of tastiest cookies I make. 

Last year, Valerie found a chocolate cookie recipe that she wanted to try.  She wanted to make them for Christmas, to boot.  Skeptical, I agreed to include them, and we made a batch.  The cookies turned out delicious and they become a welcome addition to our Christmas cookie lineup.

The best way I can describe these cookies are as a chocolate snickerdoodle.  They are moist and chewy on the inside with slightly crispy edges.  We make them the same size as our snickerdoodles and roll them in sugar before baking.  They have a really nice chocolate flavor, too.  Kind of like a brownie cookie.  Yum!

Top Secret Chocolate Cookies

Ingredients
2 1/2 sticks unsalted butter
2 cups sugar
2 eggs
1 tablespoon vanilla extract
3/4 cup Dutch process cocoa powder
2 cups all-purpose flour
1 teaspoon baking soda
1/2 teaspoon salt
Additional sugar for garnish

Directions
Preheat oven to 350 degrees F.

In a large bowl, add the butter and sugar and cream together with a hand mixer. Add the eggs and vanilla extract to the creamed mixture and mix until combined.

In a medium bowl, mix the cocoa powder, flour, baking soda, and salt. Slowly add the dry ingredients and continue mixing until incorporated. Roll the dough into walnut size balls, roll in sugar and place on wax paper lined baking sheet.  Rrefrigerate for 2 hours.

Once thoroughly chilled, place on a parchment paper lined cookie sheet and bake for 10 minutes. Remove to a wire rack to cool.

26 October 2011

Macaroni and Cheese

0 remarks


A comfort food if there ever was one.  Few things are more satisfying than sitting down with a big bowl of macaroni and cheese.  It is one of my favorite things that Grandpa used to make.  I couldn't track down his recipe, but seeing how my grandparents always had San Giorgio pasta in the pantry, I suspect his recipe may have came from the back of the box, with a few modifications.

It's those modifications that I can't put my finger on.  I've come close, but it still isn't exactly what I am looking for.  I'm pretty sure Grandpa added sauteed onions to his mac and cheese which is something I have yet to try.  Another secret ingredient that was sprinkled on top of the macaroni and cheese when I was growing up was dulse. 

Dulse is a red algae that grows along the the northern coasts of the Atlantic and Pacific oceans.  It is used as a flavor enhancer and it adds a wonderful flavor element to macaroni and cheese.  Plus, the little red flecks are visually appealing and leave people guessing as to what it could possibly be.  I can't really describe the flavor, but it is unique, and my mac and cheese is much better with it.  I don't know who started putting dulse on the macaroni and cheese in my family, but it probably has something to do with my aunt owning a natural food store.

My macaroni and cheese has become a staple at Thanksgiving and Christmas gatherings, and there is rarely any left in the dish.  It is rich, creamy, and delicious, with just the right amount of crunch along the top and sides.  The perfect accompaniment to almost any meal, especially during the autumn and winter months.

Macaroni and Cheese

8 oz elbow macaroni
4 tablespoons butter
1/4 cup flour
2 1/2 cups milk
8 oz. sharp cheddar cheese, shredded
1 teaspoon kosher salt
1 teaspoon dulse (optional)
Fresh black pepper

Preheat oven to 350 degrees. 

Cook macaroni according to package directions in salted water and drain. 

Melt the butter in a saucepan.  Once the butter is melted, whisk in the flour, salt, pepper, and 1/2 teaspoon of dulse.  Whisk in the milk until combined and free of lumps.  Bring the mixture to a boil, whisking occasionally.  Then add the shredded cheese and stir to combine.

Fold the cooked macaroni into the cheese mixture and pour into a 2-quart casserole dish.  Sprinkle the top with the remaining 1/2 teaspoon of dulse.  Bake for 30 minutes and allow to rest for five minutes before serving.

Recipe can be easily doubled and baked in a 9 x 13 pan.

30 August 2011

Peanut Butter Pie

0 remarks

What good is making your own peanut butter if you don't have a fabulous peanut butter pie recipe to go with it?  I have been making my own peanut butter for about three years, and I love to make this pie every once in a while.  I say 'every once in a while' because this pie is so rich; a little bit goes a long way.  That said, I usually take this pie to parties because it would be too much for my family to eat by ourselves in a reasonable amount of time.

If you are going to make this pie, I would recommend using AB's peanut butter recipe that can be found on Food Network's website.  If you click the 'printable recipe' link below, the peanut butter recipe will be included.  Also included in the link is AB's roasted peanut application.  I have never roasted my own peanuts for this pie, mainly because I can't find raw in-shell Spanish peanuts anywhere.  I buy roasted salted Spanish peanuts from The Sunspot, and they never fail to produce a scrumptious peanut butter.

This peanut butter pie recipe is fairly straightforward.  There are a lot of steps, but the end result is well worth it.  The hardest part is waiting for the pie to cool, which you have to do a couple times during the process of making it.  The wait is well worth it as the reward is a smooth pie, that's not too sweet, where the peanut butter is actually the star.

Peanut Butter Pie
Recipe Courtesy Alton Brown

Ingredients
6 1/2 ounces chocolate wafers
1 tablespoon sugar
5 ounces unsalted butter, room temperature, divided
1 batch homemade peanut butter
3 ounces powdered sugar, approximately 3/4 cup
1 teaspoon vanilla extract
2 ounces good quality bittersweet chocolate, chopped
1/4 cup plus 1 tablespoon heavy cream

Directions
Preheat the oven to 350 degrees F.

In the bowl of a food processor, combine the wafers and 1 tablespoon sugar. Process until the wafers are fine crumbs. Melt 3 ounces of the butter and drizzle into the crumb mixture. Pulse to combine. Press this mixture into the bottom, up the sides and just over the lip of a 9-inch metal pie pan. Place in the oven on the middle rack and bake for 10 minutes. Remove from the oven and cool completely.

After the crust has cooled, place the peanut butter and remaining 2 ounces of butter into the bowl of the food processor. Process for 1 minute. Add the powdered sugar and vanilla and process for another 1 1/2 to 2 minutes or until smooth. Carefully spread the mixture into the pie shell and return to the oven to bake for 10 minutes. Remove from the oven and allow to cool while preparing the topping.

Place the heavy cream into a heat-proof bowl and microwave on high just until simmering, approximately 30 seconds. Remove the cream from the microwave and add the chocolate. Make sure the chocolate is completely submersed in the cream. Allow to sit for 2 minutes. Gently whisk until the chocolate is melted and combined with the cream, approximately 2 to 3 minutes.

Spread the chocolate mixture over the pie and chill in the refrigerator for 1 1/2 hours before serving.

25 August 2011

Pickled Lemon Cucumbers (AB's B&Bs)

0 remarks

My goal before summer started, and before my garden was even planted, was to pickle something.  I had cucumbers in mind as the season started.  Much to my surprise, I ended up with lemon cucumbers, and since they taste almost exactly like conventional cucumbers, I figured they will be perfect for pickling. 

I hoped to pickle my cucumbers whole, but the round shape of the lemon cucumbers were a bit intimidating to me, so I looked for a pickle recipe that called for sliced cucumbers.  I looked to Alton Brown first to see what was in his repertoire and found a recipe for bread-and-butter pickles, AB's B&Bs.

The pickle prep was short and sweet, and they were sent to the refrigerator for their week long pickling process.  After the week was over, I was excited to try my yellow pickles.  Since they are bread-and-butter pickles, I expected them to be sweet, and I was not disappointed.  They were almost too sweet to eat by themselves, but they are quite delicious on hamburgers.  I imagine they would also be good made into relish, or on other hearty sandwiches like sloppy joes. 

I enjoyed my first attempt at pickling.  I really like the novelty of using lemon cucumbers as well.  Their large circumference made it so that all I needed was one pickle to cover my entire burger.  I do want to make a pickle that isn't so sweet, though.  With a number of lemon cucumbers ready to pick, I think I may try a recipe that calls for whole cucumbers.

AB's B&Bs
Recipe courtesy Alton Brown

Ingredients
1/2 medium onion, thinly sliced
2 medium cucumbers, thinly sliced
1 cup water
1 cup cider vinegar
1 1/2 cups sugar
Pinch of kosher salt
1/2 teaspoon yellow mustard seed
1/2 teaspoon ground turmeric
1/2 teaspoon celery seeds
1/2 teaspoon pickling spice

Directions
Combine the onion and cucumber in a 1-quart glass jar.  Combine the rest of the ingredients in a medium saucepan and bring to a boil.  Once boiling, reduce heat and simmer for four minutes.  Then, pour the pickling liquid over the onion and cucumber until the jar is completely full.  Cool to room temperature, then refrigerate for one week before serving. 

12 August 2011

Beer Battered Mushrooms

0 remarks

Bring the fair home with these delectable beer battered mushrooms!  One of the highlights of the county fair for me is the food.  Well, the food may be the only highlight.  Once a year, I look forward to going to the fair and indulging on the guilty culinary delights.  Fried vegetables is always on the list of items to procure.  There is just something about a selection of vegetables battered and deep fried with a side of ranch dressing that I just can't say no to.  The fried mushrooms are one of my favorites, so I wanted to try them at home.

I have made these a few times, consistently enough that the last time I made them I wrote down the recipe.  The batter couldn't be simpler, and the mushrooms are ready in no time.  The batter is versatile enough that it can be used on other vegetables as well.  I have tried cauliflower, onions, zucchini, garlic sprouts, and even cheese.  Even making them at home, the mushrooms are still my favorite.  There is just something about the crispy batter matched with the tender, juicy meat of the mushroom that is just so satisfying.  

Beer Battered Mushrooms

3/4 cups beer (your choice)
3/4 cups flour
1 teaspoon salt
1/2 teaspoon black pepper
8 oz. white button mushrooms
4 cups cooking oil

Pour the oil into a 2 quart saucepan and heat until it reaches 350 degrees.  

Add the flour, salt and pepper to a medium mixing bowl.  Slowly pour the beer into the mixture and whisk until smooth.  Dip mushrooms into the batter to coat well.  Fry mushrooms in batches of 4 or 5 in the oil for about four minutes or until golden brown.  Remove the mushrooms to a paper towel lined plate and sprinkle with a little additional salt.  Serve immediately.

27 July 2011

Rhubarb Peach Cobbler

0 remarks

Whenever I'm in the mood to consume an entire cobbler by myself, I make rhubarb peach cobbler.  I am the only one in the house who will eat rhubarb, but I usually share a couple servings with Michael, who also enjoys its tartness.  I have been making this recipe since it first aired on Good Eats in 2005. 

I have three versions of this recipe.  One from the Good Eats episode, "Cobbled Together" printed off foodnetwork.com, one from I'm Just Here for More Food, and one from Good Eats 2: The Middle Years.  I mainly use the printed recipe, but I really enjoy using the Good Eats books, so last time I made the cobbler I reached for Good Eats 2.

I noticed right away the recipe was different because it called for lemon zest instead of lime zest in the crust, yet the filling still called for lime juice.  I decided to still use lime zest since that what I was used to for this recipe.  Then, I entered bizarro world, the measurement for lard was labeled in tablespoons.  I have never seen an AB application measure lard in anything other than by weight.  I was so baffled by it, I didn't realize the recipe called for nine tablespoons!  That's a lot of lard, especially when the recipe calls for only nine tablespoons of butter.  It didn't hit me that it was way too much until I started to measure it out.  Once I saw how much nine tablespoons was going to be, I got another copy of the recipe and checked.  Indeed, the correct measurement for lard was 1.5 ounces, or three tablespoons.  I'm glad I know butter to lard ratios or I would have had one lardy cobbler.

The cobbler turned out absolutely delicious.  The rhubarb and peaches work so well together in this dish and the crust is out of this world.  The crumbled bits of crust on the bottom are soft, tender and filled with the juices from the peaches and rhubarb.  The top crust is very pie-like; tender, flaky, and delicious.  This could very well be my favorite cobbler.  I just wish I had more people to share it with.

Rhubarb Peach Cobbler
Recipe courtesy Alton Brown
Printable Recipe

Ingredients
9 1/2 ounces all purpose flour, approximately 2 cups
1 ounce sugar, approximately 2 tablespoons, plus 1 cup sugar
1 tablespoon freshly grated lime zest
1 teaspoon kosher salt, plus 1/4 teaspoon
4 1/2 ounces unsalted butter, chilled and cut into small pieces, plus extra for dish
1 1/2 ounces lard, chilled and cut into small pieces
1 1/2 ounces ice water, approximately 3 tablespoons
2 tablespoons cornstarch
1 pound rhubarb, chopped into 1/2-inch pieces
1 pound sliced peaches, peel on and sliced into 1/2 to 1-inch pieces
1 tablespoon freshly squeezed lime juice

Directions
Preheat the oven to 375 degrees F. Place a piece of aluminum foil on the bottom rack to catch any drippings. Butter a 9 by 9-inch glass baking dish and set aside.

Place the flour, 1-ounce sugar, lime zest, and 1 teaspoon salt into the bowl of a food processor and pulse 3 to 4 times. Add the butter and lard and pulse until the mixture just becomes crumbly. Sprinkle or spritz the mixture with the ice water a little at a time and process just until the dough holds together when squeezed in a fist. Place the dough into a 1 gallon zip top bag and form into a disk. Place the dough into the refrigerator for at least 30 minutes, while you prepare the filling.

In a medium mixing bowl whisk together the 1 cup of sugar, cornstarch, and 1/4 teaspoon of salt. Stir in the rhubarb, peaches, and lime juice.

Remove 1/3 of the dough from the bag, pinch into pieces and distribute evenly in the bottom of the prepared dish. With the remaining dough still in the bag, roll it out to a sheet large enough to cover the top of the dish. Pour the fruit mixture into the dish and top with the dough that has been removed from the bag, pressing the dough into the corners of the dish. Bake, uncovered, for 60 minutes or until the dough is cooked through and starting to turn golden.

Change the oven setting to broil and continue to cook until golden brown, approximately 3 minutes. Remove from the oven and allow to stand for 15 to 30 minutes before serving.

19 July 2011

Peach Cobbler

2 remarks

When I think of cobbler, peach cobbler is what instantly comes to mind.  When I think of peaches, I think of Georgia.  When I think of Georgia, I think of REM.  But, alas, REM has never published a peach cobbler recipe.  So, when I think of food and Georgia, I think of Alton Brown.  However, AB doesn't have peach cobbler recipe that uses just peaches (that's another post).  So, when I think of food and Georgia and eliminate the AB variable, I think of Paula Deen. 

Of course she has a peach cobbler recipe, in fact, it's the first thing that comes up in a 'peach cobbler' Google search.  I have been making this cobbler for a long time, mainly taking it to summer family pitch-ins.  It is always a hit, and I rarely take home any leftovers.  The dough is buttery, light and fluffy, and the peaches work in perfect harmony to bring the dish together.

I always use fresh peaches when making this cobbler, and I usually use about five or six cups instead of the recommended four.  Otherwise, I follow the instructions as they are written.  For me, it is nice to have another use for self-rising flour, which I tend to have on hand for biscuits.  I use a 9x13 baking dish for the cobbler and mine tend to bake for about 40-45 minutes.  I also prefer to eat my peach cobbler without any whipped cream or ice cream, though I am sure they would be a delicious addition. 

Peach Cobbler
Recipe courtesy Paula Deen
Printable Recipe

Ingredients
4 cups peeled, sliced peaches
2 cups sugar, divided
1/2 cup water
8 tablespoons butter
1 1/2 cups self-rising flour
1 1/2 cups milk

Directions
Preheat oven to 350 degrees F.

Combine the peaches, 1 cup sugar, and water in a saucepan and mix well. Bring to a boil and simmer for 10 minutes. Remove from the heat.

Put the butter in a 3-quart baking dish and place in oven to melt.

Mix remaining 1 cup sugar, flour, and milk slowly to prevent clumping. Pour mixture over melted butter. Do not stir. Spoon fruit on top, gently pouring in syrup.  Batter will rise to top during baking. Bake for 30 to 45 minutes.

To serve, scoop onto a plate and serve with your choice of whipped cream or vanilla ice cream.

14 July 2011

Blueberry Cobbler

0 remarks

I have yet to meet a cobbler I didn't like, and this blueberry cobbler is no exception.  I found the original recipe when I was looking for a new dessert to make with fresh strawberries.  Somehow, I stumbled upon this dish and I'm glad I did. 

The first time I made it, I used frozen blueberries and added some fresh strawberries (just because I was determined to use strawberries, I guess).  The result was a very soupy cobbler, which wasn't what I was going for at all.  The flavor was wonderful, though, so I wanted to make it again.  I ditched the strawberries, switched to fresh blueberries, and with a few other tweaks, came up with a very pleasing summer dessert.

The cobbler comes together very much like a peach cobbler recipe that I have.  An interesting ingredient to this application is boiling water.  The boiling water, poured directly on top of the cobbler just before baking, adds a shine and a nice subtle crispiness to the crust.  It is like a combination of pie and cake, and the softness and juiciness of the blueberries are a perfect compliment.  I can see myself making this cobbler again and again.

Blueberry Cobbler
Printable Recipe

Ingredients
3 cups fresh blueberries
1/2 lemon, juiced
1 3/4 cups sugar (divided)
4 1/2 tablespoons butter, softened
1 1/2 cups all-purpose flour
1 1/2 teaspoons baking powder
3/4 cup whole milk
1 1/2 tablespoons cornstarch + 1 teaspoon
3/4 teaspoon salt
1/4 teaspoon ground cinnamon
3/4 cup boiling water

Directions
Preheat oven to 350 degrees and lightly grease an 11x7 inch baking dish.

Add the blueberries to the baking dish. Squeeze the juice from the lemon over them, add 1 teaspoon of cornstarch and mix to combine. In a medium bowl, mix together the butter and cup of sugar until smooth. Combine the flour and baking powder and add to the sugar mixture alternately with the milk until smooth. Spoon over the berries, and spread evenly.

In another bowl, combine 3/4 cup of sugar, salt, cinnamon and 1 1/2 tablespoons of cornstarch. Sprinkle evenly over the top of the batter. Then, pour the boiling water over the entire dish.

Bake for 50 minutes or until golden brown.

21 May 2011

Hummus

3 remarks

It all started when Valerie wanted hummus, but didn't want to spend an arm and a leg for her favorite brand.  The others just weren't "garlicky" enough for her, so I decided to make my own.  I figured it would be a simple process of pureeing chickpeas with tahini, olive oil, lemon juice and garlic.  I was right, hummus is easy to make, and I was able to add as much garlic as Valerie could handle.

I like to use dried chickpeas when I make hummus, and I had to plan ahead before I made it since I had to soak the legumes overnight before cooking them.  I don't really have a recipe, I just referenced a few on the internet to get an idea of the ratios of tahini and olive oil.  When I am making it, I usually have Valerie come do a taste test for her final approval.

Much to my surprise, my hummus making became much easier after watching the "Pantry Raid XIII, Destination Chickpea" episode of Good Eats.  In the episode, Alton Brown cooked dry chickpeas in a slow cooker and they were ready in as little as four hours.  Intrigued, I tried preparing my chickpeas in this fashion, and they were perfect.  They had a creamy texture that I was never able to achieve in my cooking method.

So, not only did I find a better, quicker way to cook my chickpeas, they also taste better.  AB's hummus recipe still doesn't have enough garlic for Valerie, but I have adopted his preparation method because I think it yields a smoother end result.  One thing I wouldn't stray away from is cooking the chickpeas in a slow cooker. 


Slow Cooker Chickpeas
Recipe courtesy Alton Brown

Ingredients
7 cups water
1 pound dried chickpeas, sorted and rinsed
1/4 teaspoon baking soda

Directions
Place the water, chickpeas, and baking soda in a 2 1/2-quart slow cooker. Cover and cook on high heat for 4 hours, or low heat for 8 to 9 hours, or until tender. Drain and serve immediately, or use in desired dish.

------------------------------------------------------


Hummus For Real
Recipe courtesy Alton Brown
Printable Recipe

Ingredients
1 pound Slow Cooker Chickpeas, cooled
2 cloves garlic, minced
1 1/2 teaspoons kosher salt
5 tablespoons freshly squeezed lemon juice
1/4 cup water
1/3 cup tahini, stirred well
1/4 cup extra-virgin olive oil, plus extra for serving
Powdered sumac, optional

Directions
Place the chickpeas, garlic, and kosher salt in the bowl of a food processor. Process for 15 to 20 seconds. Stop, scrape down the sides of the bowl, and process for another 15 to 20 seconds. Add the lemon juice and water. Process for 20 seconds. Add the tahini. Process for 20 seconds, then scrape down the sides of the bowl. With the processor running, drizzle in the olive oil.

To serve, transfer the hummus to a bowl and drizzle with additional olive oil and sprinkle with sumac, to taste, if desired.

20 April 2011

Falafel

2 remarks

I don't know exactly how it happened, but our family has become quite the fan of falafel over the years.  I think it all may have started when I worked at The Sunspot years ago, going to the natural food trade shows; a vendor gave me a free falafel mix.  With the mix, all I had to do was add water, leave it be for about fifteen minutes, portion, and fry.  It was easy and delicious, and it was a nice change of pace.

Fast forward a few years and I wanted to try to make my own falafel.  I found a recipe online and made a batch.  The falafel I made from scratch wasn't that much better than the mix I used, so I kept using the mix whenever a craving hit because it was easier. 

Fast forward another couple years, and imagine my delight when I saw that Alton Brown would be doing a chickpea episode of Good Eats.  Well, I was very delighted, and the episode did not disappoint.  Not only did AB give me a fantastic recipe for falafel, he also gave me a great new hummus technique, but that's another post.

After the episode aired, I knew I would be making the falafel on Friday night.  It came together very easily, and I was happy to have another use for my meat grinder.  I actually portioned the falafel on Thursday, so all I had to do was fry them of Friday.  I love low stress dinners, and this was about as low stress as it can get.  But the proof was in the tasting.

Unlike the previous falafel recipe I used, AB's recipe is much better than the mix.  It is definitely worth the effort.  The flavors are not muddled and the texture obtained by grinding the chickpeas is very nice.  The bit of heat from the cayenne pepper is also a nice touch.  Bye-bye mix, I have a new way to make falafel!


Falafel
Recipe courtesy Alton Brown
Printable Recipe

Ingredients
•1 pound dried chickpeas, sorted and rinsed
•1 teaspoon whole cumin seed
•1 teaspoon whole coriander seed
•2 cloves garlic, coarsely chopped
•4 small scallions, trimmed and finely chopped
•2 teaspoons kosher salt
•1/2 teaspoon freshly ground black pepper
•1 teaspoon aluminum-free baking powder
•1/2 teaspoon cayenne pepper
•2 tablespoons chopped fresh parsley leaves
•2 quarts peanut oil
•Pita bread, warmed, for serving

Directions
Place the chickpeas in a medium bowl and cover with 2 inches of cold water. Soak overnight.

Place the cumin and coriander seeds in an 8-inch cast-iron skillet and set over medium high heat. Cook, shaking the pan frequently, until the seeds give off an aroma and just begin to brown, 3 to 4 minutes. Transfer the toasted spices to a spice grinder and process until finely ground. Set aside.

Drain the chickpeas. Combine the soaked chickpeas, ground cumin and coriander, garlic and scallions, salt, black pepper, baking powder, cayenne pepper, and parsley leaves in a medium mixing bowl.

Pass this mixture through a meat grinder or stand mixer with the grinder attachment fitted with the smallest die. Alternatively, you can divide the mixture in half and process one half at a time in a food processor, pulsing 10 to 20 times.

Scoop the mixture into 1 1/2 to 2-ounce portions using a 2-inch diameter disher. Place on a half sheet pan lined with parchment. Can be held hold at room temperature for up to 2 hours before frying, or covered in the refrigerator overnight.

Heat the peanut oil in a 5-quart Dutch oven over high heat until it reaches 350 degrees F. Adjust the heat to maintain temperature. Gently place the falafel, 1 at a time, into the hot oil. Fry 4 at a time until deep golden brown, 5 to 7 minutes. Remove to a half sheet pan lined with a cooling rack and topped with a paper towel to drain. Repeat until all falafel have been cooked. Serve on warm pita.

27 March 2011

Mississippi Mud Cake

2 remarks

It's hard to top chocolate cake.  Unless it's topped fresh from the oven with marshmallows, warm chocolate frosting, and toasted pecans.  This dessert, when served warm, has quickly become one of my favorites. 

I stumbled upon this recipe by accident.  I was looking for a recipe for Mississippi Mud Pie and I couldn't decide on what one to use.  Every recipe I found was drastically different from the next, and none of them sounded particularly good.  Most of them also called for pudding mix or whipped topping; which weren't ingredients I wanted to use.  Plus, having never eaten Mississippi Mud Pie, I didn't know which recipe was traditional or authentic. 

I went to the Food Network site to look for a recipe, and when I was typing in the search field, "Mississippi Mud Cake" was a suggested search option.  I looked through the cake recipes and decided to go with Emeril's rendition.  Bam!

This cake is best served warm.  The cake is moist, dense, rich, and not too sweet; and it goes nicely with the soft, warm, gooey sweetness of the marshmallows.  The liquid hot chocolate frosting also contributes to the gooey meltiness.  The subtle crunch and flavor of the toasted nuts is the perfect way to finish the cake. 


Mississippi Mud Cake
Recipe inspired by Emeril Lagasse
Printable Recipe

Ingredients
2 cups all-purpose flour
2 cups sugar
1 teaspoon baking soda
1/2 teaspoon salt
1/2 pound unsalted butter
1/3 cup cocoa powder
1 cup water
1/2 cup buttermilk
2 eggs, lightly beaten
1 teaspoon vanilla
8 ounces mini marshmallows

For the frosting:
4 ounces unsalted butter
1/3 cup cocoa powder
1/2 cup buttermilk
16 ounces confectioners' sugar
1 teaspoon vanilla extract
Pinch salt
3/4 cup chopped nuts (pecans or walnuts), lightly toasted

Directions
For the cake:
Preheat the oven to 350 degrees and grease a 9 by 13-inch pan.

Combine the flour, sugar, baking soda and salt in a mixing bowl.

Melt the butter in a small saucepan and add the cocoa and water.  Bring the mixture to a boil. Once boiling, add the cocoa mixture to the dry ingredients and stir until just combined.

Next, add the buttermilk, eggs, and vanilla and stir until smooth. Pour into the prepared pan and bake for 35 to 40 minutes or until the cake passes the toothpick test.

Transfer to a wire rack and immediately sprinkle the marshmallows over the hot cake.

For the frosting:
Melt the butter in a medium saucepan and add the cocoa powder and buttermilk.  Bring the mixture to a boil. Then, remove from the heat and add the confectioners' sugar, vanilla, and salt and mix until smooth.

Immediately pour the icing over the marshmallows on the cake and sprinkle with nuts. Let the cake cool to lukewarm before serving.

20 March 2011

Orange Marmalade

2 remarks
The pressure was on!  I received a canning starter kit for Christmas and the proposition of making my own preserves stared me right in the face.  I love jams, jellies, and other preserves, but the thought of doing it myself intimidated me.  Now that I had the starter kit, I had no more excuses, it was time to start canning!

Orange marmalade came to mind when I first thought about what to make first.  I enjoy the sweetness of the jelly paired with the bitter if the rind.  A flavor sensation!  So, I picked up some organic oranges at the store, grabbed Alton Brown's orange marmalade recipe and got to work.


Orange Marmalade
Recipe courtesy Alton Brown
Printable Recipe

Ingredients
1 3/4 pounds oranges, 4 to 5 medium
1 lemon, zest finely grated and juiced
6 cups water
3 pounds plus 12 ounces sugar

Special Equipment: 10 (8-ounce) canning jars with rings and lids, funnel, tongs, ladle, and 12-quart pot

Directions
Wash the oranges and lemon thoroughly. Cut the oranges into 1/8-inch slices using a mandoline, removing the seeds as you go. Stack the orange slices and cut them into quarters. Place the oranges into an 8-quart stainless steel pot.


Add the lemon zest and juice and the water to the pot, set over high heat and bring to a boil, approximately 10 minutes. Once boiling, reduce the heat to maintain a rapid simmer and cook, stirring frequently, for 40 minutes or until the fruit is very soft.


While the fruit is cooking, fill a large pot (at least 12-quart) 3/4 full with water, set over high heat and bring to a boil. Place 10 (8-ounce) jars and rings, canning funnel, ladle, and tongs into the boiling water and make sure the water covers the jars by at least an inch. Boil for 10 minutes. Turn off the heat, add the lids and leave everything in the pot until the marmalade is ready.

Meanwhile, place a small plate in the freezer. Increase the heat under the orange mixture to return to full boil. Add the sugar and stir the mixture continually, until it reaches 222 to 223 degrees F on a deep-fry or candy thermometer, and darkens in color, approximately 15 to 20 minutes. You may need to adjust the heat in order to prevent boil over. Test the readiness of the marmalade by placing a teaspoon of the mixture onto the chilled plate and allowing it to sit for 30 seconds. Tilt the plate. The mixture should be a soft gel that moves slightly. If mixture is thin and runs easily, it is not ready.


Remove jars from the water and drain on a clean towel. Place a canning funnel onto the top of 1 of the jars and ladle in the marmalade just to below the bottom of the threads of the jar. Repeat until all of the mixture has been used. The amount of marmalade may vary by 1 to 2 jars. Wipe the rims and threads of the jars with a moist paper towel and top each with a lid. Place a ring on each jar and tighten.

Return the jars to the pot with boiling water, being certain that they don't touch the bottom of the pot or each other. (If you don't have a jar rack, try a round cake rack, or metal mesh basket. Even a folded kitchen towel on the pot bottom will do in a pinch.) Add additional water if necessary to cover the jars by at least an inch. Boil for 10 minutes. Using canning tongs, carefully remove the jars from the water, place in a cool dry place and allow to sit at room temperature for at least 24 hours before opening. Once open, store in the refrigerator. Unopened marmalade will last for up to 6 months.


The canning process wasn't as difficult as I thought it would be.  It was actually a lot of fun, and the jars of marmalade were so beautiful to look at.  The twenty-four wait before I could open my first jar was gruelling, but well worth it.  I made biscuits that evening just for the occasion.


The marmalade is even better than I could have dreamed.  It's the perfect balance between sweet and bitter and the texture of the orange rind is almost like candy.  It was wonderful on the biscuits, but is also very tasty on toast.

My first canning experience was a resounding success and I am already thinking about what to do next.  With strawberries coming into season, strawberry rhubarb preserves sound awfully tempting.  Oh, the possibilities!

28 February 2011

Crêpes

6 remarks
I know you have all been eagerly waiting with bated breath since I announced I would be doing a product review for CSN stores.  Wait no more!  Behold the product review as promised! 

Choosing a product to review proved to be no easy task.  I knew I wanted to review a kitchen product, and I wanted to try something new.  After lots of browsing and just before Valerie was about to snap from all the ideas I was bouncing off her, I found it.  A Cuisinart Crêpe Pan

I had been wanting to make crêpes for a long time.  In fact, before I made them, I had never even had a crêpe.  My interest began when I was working at a bank in Indianapolis.  Every Friday, someone from the branch brought breakfast for everyone.  My manager Emmanuel, who was from France, was excited because someone was bringing crêpes and Nutella for breakfast.  That morning, as Emmanuel was smearing Nutella on his 'crêpe', he looked at me and said, "These are not crêpes."  He was right, they were pancakes, and he went on to explain how crêpes are not like pancakes in that they are unleavened and wafer thin.  I took that to heart, and I always wandered what a real crêpe would taste like.

As the years went by, I would see crêpe pans in kitchen stores just begging me to buy them.  While tempted to by one, I never did.  This product review opportunity from CSN Stores pushed me over the edge, and I anxiously waited for my pan to arrive in the mail.  When it arrived, I opened the box to observe the new hardware.  The pan looked nice; it had sloping sides with a distinct bottom, just like Alton Brown recommends.  Then, the real test came.  Does it look good on my pot rack?

Yes!

The weekend finally came and I was ready to actually make crêpes.  I used Alton Brown's recipe, and the batter came together in an instant.  Then came the fun part, cooking the crêpes.  It definitely took some practice to get the batter to spread in the pan evenly.  In order to keep the crêpes thin, I had to use just enough batter to barely coat the bottom of the pan.  My first couple crêpes looked like jellyfish, but I finally got the hang of it.  


This is the only nonstick pan I own, and it certainly comes in handy.  With the nonstick pan and a little butter, I did not have a problem with any of the crêpes sticking.  In fact, I was able to flip them by hand; mainly because I couldn't figure out any other way to do it.


The batter made over a dozen crêpes and we enjoyed them that morning with a little Nutella and bananas.  The crêpes were more delicious than I imagined them to be, and they were quite durable for being so thin. 
They were tender, delicate, slightly sweet, and the Nutella and bananas were a perfect compliment.


I should have garnished the plate a little better to improve presentation, but we just couldn't wait to eat.  The crêpes were a bit intimidating at first, but once I got the hang of it, they were a cinch to make.  The pan was very nice, too, and I am sure I will use it again and again.\


Crêpes
Recipe courtesy Alton Brown

Ingredients
2 large eggs
3/4 cup milk
1/2 cup water
1 cup flour
3 tablespoons melted butter
2 1/2 tablespoons sugar
1 teaspoon vanilla extract
Butter, for coating the pan

Directions
In a blender, combine all of the ingredients and pulse for 10 seconds. Place the crepe batter in the refrigerator for 1 hour. This allows the bubbles to subside so the crepes will be less likely to tear during cooking. The batter will keep for up to 48 hours.

Heat a small non-stick pan. Add butter to coat. Pour 1 ounce of batter into the center of the pan and swirl to spread evenly. Cook for 30 seconds and flip. Cook for another 10 seconds and remove to the cutting board. Lay them out flat so they can cool. Continue until all batter is gone. After they have cooled you can stack them and store in sealable plastic bags in the refrigerator for several days or in the freezer for up to two months. When using frozen crepes, thaw on a rack before gently peeling apart.

15 February 2011

Avocado Buttercream Frosting

3 remarks

Curious, yet tasty, this Alton Brown application is sure to please.  Lemony, sweet, creamy, and green, it is unlike any frosting I have ever made, and it would surely make Dr. Seuss proud.  I made this frosting to go on a cake I took to my mom's Super Bowl party, thinking it would be a fun way to use avocados in a less traditional way.  The Hass Avocado Board stated that 53.5 million pounds of avocados were eaten on Super Bowl Sunday; I doubt many pounds were eaten as frosting.  So, I was happy to contribute my 8 ounces.

The first time I met Alton was on June 4, 2005 at the Castleton Square Mall in Indianapolis.  During the live demonstration, he was showcasing different ways to use avocados.  I was so far away, I couldn't really see him or hear what he was saying.  On November 2, 2005, "Curious Yet Tasty Avocado Experiment" aired and I was finally able to see what AB was doing with those avocados.  Being an avocado lover, I had to give the recipes a try.  My favorite recipe from the avocado experiments is the avocado buttercream frosting.  It not only looks cool, it tastes pretty good, too. 


Avocado Buttercream Frosting
Recipe courtesy Alton Brown
Printable Recipe

Ingredients
•8 ounces avocado meat, approximately 2 small to medium
•2 teaspoons freshly squeezed lemon juice
•1 pound powdered sugar, sifted
•1/2 teaspoon lemon extract

Directions
Peel and pit the avocado. Place the avocado into the bowl of a stand mixer fitted with the whisk attachment along with the lemon juice and beat until lightened in color, approximately 2 to 3 minutes. Add the powdered sugar a little at a time and beat until smooth. Add the lemon extract and mix to combine. If not using right away, store in the refrigerator.

27 January 2011

Orange Sherbet

1 remarks

My sister Angela loves sherbet.  It seems that whenever we go to an ice cream parlor that serves sherbet, that's what she orders.  Ari is following in her footsteps.  He always wants a fruity ice cream or sherbet if it's available.  As for me, I'm not a big fan.  Most sherbets I have tried are too sweet and the flavors are too strong and artificial to me.  Plus, there is just something strange about eating neon colored food.

My negative opinions of the orange stuff changed dramatically after making my own.  Why did I even make something that I do not enjoy eating?  Well, I did it for my sister, of course!  I also wanted to see how much better homemade sherbet would be compared to the mass-market variety.  I also had a bag full of oranges sitting on the counter just begging to be made into sherbet. 

I honestly can't remember why we had a bag of oranges since we hardly ever buy big bags of fruit.  Ari is a self-proclaimed orange lover, but he is extremely picky about the amount of pith on the orange segments.  It makes peeling an orange to his satisfaction nearly impossible.  Because of that, I decided to forgo the frustration associated with pith pickiness and just juice the oranges for sherbet.

I had all the ingredients on hand and the sherbet was very easy to make.  Eliminating the orange zest was the only modification I made to the recipe.  The oranges were no longer at their peak of freshness and some of the orange peels looked a bit suspect, so I was leery of using the zest.  But, the juice was still very tasty and I had sherbet in no time. 

The orange sherbet I made is unlike any I have ever had.  The flavors are fresh and not overpowering.  There is a genuine orange taste that is so refreshing.  The sherbet is smooth, light, and delicious; and I would be happy to make it again.   The application is so simple, too, I am thinking about trying it with other fruits.  Perhaps pineapple would make a tasty sherbet.  The possibilities are endless!

Orange Sherbet
Recipe courtesy Alton Brown
Printable Recipe

Ingredients
7 ounces sugar
1 1/2 tablespoons finely grated orange zest
1/4 teaspoon kosher salt
2 cups freshly squeezed orange juice, approximately 2 to 3 pounds oranges
1 tablespoon freshly squeezed lemon juice
1 teaspoon vanilla extract
1 1/2 cups very cold whole milk

Directions
In the bowl of a food processor combine all of the ingredients except the milk and process until the sugar is dissolved, approximately 1 minute. Transfer the mixture to a mixing bowl and whisk in the milk. Cover the bowl and place in the refrigerator until the mixture reaches 40 degrees F or below, approximately 1 hour.

Pour the mixture into an ice cream maker and process until it is the consistency of soft serve ice cream. You may serve now or transfer to a lidded container and place in freezer until firm, approximately 3 hours. Makes about 1 quart.

LinkWithin

Related Posts with Thumbnails