18 April 2015

Dark Chocolate Mousse

0 remarks

My memories of chocolate mousse stem from the Ponderosa buffet.  Rich, fluffy, and chocolaty, it was always a dessert I piled high in my bowl.  I have had the thought of making my own chocolate mousse many times, but the Alton Brown recipe didn't intrigue me enough to do it.  AB's calls for espresso and rum, two ingredients I don't keep on hand, and my desire to make the mousse wasn't strong enough to make the investment.

Queue Geoffrey Zakarian's mousse featured on The Kitchen.  It was the Valentine's Day episode and we were having a family gathering at my house one Saturday morning.  For some reason, Food Network always seems to be on when we have a bunch of family over for breakfast.  I happened to hear Geoffrey Zakarian talking about how simple and delicious this mousse was, so I decided to surprise Valerie with some on Valentine's Day.

Emilie helped me make the mousse, and it really was as simple as Zakarian made it sound.  Basically it's just melting, whipping, beating and folding.  The only thing I didn't know for sure was how much to heat the egg yolks over the water bath.  I did it until they were just warm to the touch, and it came out perfectly.  I don't know if the temperature really has that much impact on the final result, but it worked for me.

The mousse came together in no time, and we were dishing it in serving bowls to cool.  After few hours in the refrigerator, we topped the mousse with whipped cream and some shaved chocolate and it was time to devour.  The first bite was all it took to realize this is probably the best dessert I have ever made.  The mousse was rich, dense, smooth, airy, and soft, with an intensely satisfying chocolate flavor.  Combined with the sweet lightness of the whipped cream, it just hit on all the right notes.  I really can't describe how amazing the texture was, I guess I'll just have to make it again to see if I can better put it into words.

Geoffrey Zakarian's Dark Chocolate Mousse

Ingredients
1/2 cup chopped chocolate (72 percent)
1 cup heavy cream
4 large egg yolks
1/3 cup sugar
Toppings:
Whipped cream, for serving
Chocolate shavings, for garnish

Directions
Melt the chocolate in a bowl over a simmering water bath.  After melting the chocolate, whip the heavy cream to soft peaks in a separate bowl. Set both bowls aside.

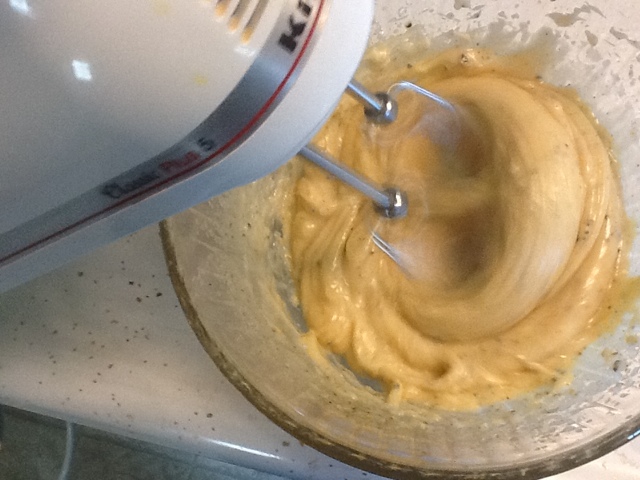
Add the egg yolks to the bowl of a stand mixer and set over the same water bath to slightly heat while beating them with a whisk. Next, add the sugar to the yolks and then transfer the bowl to the stand mixer set up with the whisk attachment. Beat the yolk and sugar mixture until the sugar is completely dissolved and it doubles in size, about 5 minutes.

Delicately fold the melted chocolate into the yolks. Finally, fold in the whipped cream. Divide the mixture into 4 bowls or glasses and refrigerate for 2 to 3 hours.

Just before serving, top the mousse with whipped cream and garnish with chocolate shavings.

04 April 2015

Baked Eggs

0 remarks


Ah, Easter.  Time to hard cook some eggs.  As we all know, and have probably done hundreds of times, you could just boil your eggs for dying or eating.  However, if you want to do more than one dozen at a time, baking is the way to go.  Yes, I said bake those eggs!

First, make sure the oven racks are positioned in the center of the oven,  Then, arrange the eggs on a metal cooling rack and place them in a cool oven.  Set the oven to 325 degrees F and bake for 30 minutes.  After 30 minutes, move the eggs directly from the oven into a bowl of ice water.

If you are peeling the eggs and not dying then, make sure to peel them as soon as they are cool enough to handle.  You can then return them to the ice bath to chill thoroughly.

A fun little tidbit I recently learned regarding the peeling of eggs is that the age of an egg does make a difference. Freshly laid eggs are more likely to stick to the shell, while older eggs release from the shell more freely.  Here in the U.S., eggs can sit for up to 30 days before being packaged, and the sell-by date can be another 30 days after that.  Say what?  This means that the eggs you're getting at the supermarket are old enough that no further aging at home should be necessary to get a nice clean shell release. If you are buying farm fresh eggs or you keep a few hens around, then you may want to let your eggs sit for a couple of weeks before hard cooking them. 

I learned this the hard way as deviled eggs had become bane of my existence.  I always ended up abandoning that idea and just making egg salad after I mangled the eggs.  On the bright side, I know that my eggs were really freash.  But now I know age is important, and my eggs will be mangled no more! 

02 April 2015

Chicken Salad

0 remarks
Spring is in the air and chicken salad is calling.  For me, all I need are four ingredients.  Chicken, mayonaisse, celery, and dried cranberries.

To prepare my chicken salad, I start off with two bone-in, skin-on chicken breasts.  I drizzle them with oil and then sprinkle them liberally with salt and pepper.  I roast them in a 350 degree oven for about 40 minutes or until the internal temperature reaches 165 degrees.  Once the chicken is done, I let it cool completely before shredding.


After the chicked is shredded, it's just a matter of combining all the other ingredients.  To the shredded chicken, I add about 1 cup of maionaisse, preferrably homemade.  Then I dice 3 stalks of celery to add to the chicken.  Last but not least, I chop about 1/2 cup of dried cranberries and add them to the party.


That's all there is to it.  Simple and delicious.  Roasting the chicken gives it a deeper flavor and keeps it tender and juicy.  The creaminess of the mayonaisse, combined with the crunch of the celery is all complimented by the chewy sweetness of the cranberries.  All the flavors shine.  All you need is some toasted bread and maybe a little lettuce for the perfect chicken salad sandwich.  Although, I have been known to just sit down and eat it out of the bowl with some club crackers.  Who's hungry?

10 September 2014

Cheesecake

0 remarks
 
Finding the perfect cheesecake recipe has been elusive for me.  I like Alton Brown's version in "I'm Just Here for More Food", but I usually crave something more rich and dense when I think of cheesecake.  His version almost has more of a soft custard quality.  But, I love the crust and I love his technique.  It never fails.
 
So, looking for the rich, dense, style cheesecake, I came across a recipe that seemed to fit the bill on allrecipes.com.  I made this cheesecake a few times, and while it was always good, it usually cracked on top and the sides browned and rose up over a sunken middle.  The crust left something to be desired, too.  The filling had good flavor and texture, so it had potential.
 
I decided to combine the things I liked best about both recipes to create my own version.  The crust and technique from AB's cheesecake combined with the filling recipe from the allrecipes.com cheesecake.  To my delight, this resulted in the best cheesecake I have ever made.
 
The filling set up beautifully.  It was smooth yet dense and not grainy at all with a nice rich flavor.  The crust had so much flavor, too, with just the right texture and a nice subtle crunch.  It is a beautiful cheesecake to look at, with no cracks along the top and a nice shiny flat surface.  It was also nice to not need to cover cracks with whipped cream and leave it optional.  Though is it ever really?  I think I may have cracked the code to my perfect cheesecake!
 
Cheesecake
 
Crust:
25 graham cracker squares
3 ounces unsalted butter, melted
1 tablespoon sugar
 
Filling:
4 (8 ounce) packages cream cheese
1 1/2 cups white sugar
1 cup sour cream
1/4 cup all-purpose flour
4 eggs
3/4 cup milk
1 tablespoon vanilla extract
 
Preheat oven to 300 degrees F and grease a 9 inch spring form pan.  Put a double layer of heavy duty aluminum foil along the bottom and up the sides of the pan.
 
In the bowl of a food processor, combine the graham crackers, melted butter, 1 tablespoon of sugar, and pulse until combined. Press the mixture into the bottom and 1 inch up the sides of the pan. Blind bake the crust for 10 minutes, then cool.
 
Increase oven temperature to 350 degrees F and place a pan of water on the middle rack large enough to hold the spring form pan.
 
In a mixer with a paddle attachment, beat the cream cheese and sugar and on low for 30 seconds and then turn it up to medium. Scrape the bowl two times during this process to make sure the sugar and cream cheese are fully integrated. 
 
In a separate bowl, combine sour cream, flour, eggs, milk and vanilla and whisk until smooth. With the mixer on medium, slowly pour the liquid mixture in. When half of it is incorporated, stop the mixer and scrape the bowl. Continue adding the mixture until all the ingredients are incorporated. Once completely combined, pour into the cooled crust.
 
Place cheesecake into the preheated water bath and bake in the oven for 1 hour. Then, turn the oven off and do not open the oven door for two more hours. Remove the cheesecake from the water bath and place in the refrigerator for at least 6 hours before serving. 

07 October 2013

Mac and Cheese Toast

0 remarks
 
Leftover mac and cheese?  Fry it up!  I have wanted to make this since I first saw the Good Eats episode air back in 2002.  Well, here we are in 2013 and I finally got around to it.  Let me tell you, I should have tried it sooner and I am tempted to make some mac and cheese just to cube it up and fry it the next day.
 
Mac and Cheese Toast
An Alton Brown application
Printable recipe

Ingredients
Leftover baked macaroni and cheese, refrigerated for at least overnight
1 cup all-purpose flour
1 teaspoon salt
1 teaspoon pepper
1 egg beaten with 2 ounces water
1 cup panko bread crumbs
Oil for deep frying, preheated to 375 degrees

Directions
Cut refrigerated macaroni and cheese into bite size pieces, about 1.5 inches. Season the flour with salt and pepper. Dredge each piece through the flour and tap off excess. Dip in the egg mixture and then coat with the panko bread crumbs. Rest the cubes for 5 minutes so the crust can set. Carefully drop into the oil and fry until golden brown, 3-4 minutes. Remove to a cooling rack and rest for 2 minutes before serving.

21 August 2013

Alton Brown's Chocolate Chip Cookies

0 remarks
The Chewy.  This could be my favorite Alton Brown recipe.  I know it is my most requested.  The Good Eats episode had three versions of chocolate chip cookie recipes, but only this one made it into the Good Eats book.  For good reason, these cookies are superior than any I have ever baked, or even eaten.  These cookies could build an empire.

I like my cookies soft and chewy, so this is the recipe for me. The slightly browned crispy edges leading into warm, chewy, melt-in-your-mouth center is exactly what I want in a cookie, and the chewy delivers.  This recipe is also what caused me to buy a digital scale, and I now prefer measuring by weight instead of volume in all my recipes.

The dough also freezes incredibly well.  So much so, that when I make them, I usually freeze them for an hour instead of putting them in the refrigerator.  By freezing them, the cookies don't flatten out as much, and the middle is just a little bit gooier. 

 
To do this, just dish the dough out in cookie size portions and freeze on a baking sheet. Once the cookies are frozen, transfer them to a freezer bag for storage.  This way, you can have fresh baked cookies whenever you want them without doing all the work.  
 
 
The Chewy
An Alton Brown recipe

Ingredients
8 ounces unsalted butter
12 ounces bread flour
1 teaspoon kosher salt
1 teaspoon baking soda
2 ounces granulated sugar
8 ounces light brown sugar
1 large egg
1 large egg yolk
1 ounce whole milk
1 1/2 teaspoons vanilla extract
12 ounces semisweet chocolate chips

Directions
Melt the butter in a small saucepan over low heat, then into the bowl of a stand mixer. Add the sugar and brown sugar and beat with the paddle attachment on medium speed for 2 minutes.

Next, add the whole egg, the egg yolk, milk and vanilla extract.  Continue to mix on slow until thoroughly combined.

Sift together the flour, salt and baking soda.  Slowly add the dry ingredients, until all the flour is worked in.  Lower the speed to "stir" and add the chocolate chips.

Scoop the dough into 1 1/2-ounce portions onto a parchment-lined half sheet pans and refrigerate for an hour.

When ready to bake, preheat the oven to 375 degrees.  Place 6 cookies per sheet and bake 2 sheets at a time for 15 minutes, rotating the pans halfway through.

Remove from the oven, slide the parchment with the cookies onto a cooling rack and wait at least 5 minutes before serving.

If not baking all the cookies, freeze the remaining cookie for later use following the same baking instructions.

18 August 2013

Blueberry Soda

0 remarks


My dad got me a SodaStream soda maker for my birthday this year and I couldn't wait to get started on making my own syrups. This blueberry soda recipe immediately came to mind, so I patiently waited for blueberry season. When we finally had enough blueberries, I got to work.

Making the syrup is very simple. It's basically like making a simple syrup, except you make blueberry juice first. So, the syrup was done in no time. The hardest part was waiting for it to cool. Once it was completly cool, I made myself some carbonated water and slowly added the blueberry syrup. Just like that I had blueberry soda! 

This first thing I noticed was how beautiful the color was.  The soda is such a deep purple, and the bubbles are a delicately lighter color.  A treat of the eyes as well as the taste buds.  Speaking of taste, drinking the soda is like have a mouth full of blueberries.  As expected, the blueberry flavor shines, and the sweetness is not overpowering.  The lime juice adds a nice tartness, to make it a well rounded beverage.

Blueberry Soda
An Alton Brown Recipe

Ingredients
20 ounces fresh blueberries, approximately 4 cups, rinsed and drained
2 cups water
7 ounces sugar
1 lime, juiced
Carbonated water

Directions
Put the blueberries and water into a medium saucepan over medium-high heat. Bring to a boil, then reduce heat to low and simmer for 15 minutes. Remove the saucepan from the heat and pour the blueberry mixture into a cheesecloth lined colander in a large bowl. Allow the mixture to cool for at least 15 minutes or until it is cool enough to handle.

Gather up the edges of the cheesecloth and squeeze out as much of the liquid as possible. Discard the skin and pulp. Put the blueberry juice back into the saucepan and add the sugar and lime juice. Bring to a boil over medium high heat and stir until the sugar has dissolved, then cook for an additional 2 minutes. Remove from the heat and transfer to a glass container.

Place the syrup in the refrigerator, uncovered, until completely cooled. To Serve: Combine 1/4 cup of the liquid with 8-ounces of carbonated water and serve over ice.

25 July 2013

Homemade Mayonnaise

0 remarks
I realize I have posted about making my own mayo before, but I failed to post a recipe.  What can I say?  I was young.  Back then, I had a bad habit of posting about the food I made without including a full recipe.  Well, I am now here to rectify myself. 

Mayonnaise is very simple to make, and I almost always have all the ingredients in my pantry.  It is quite versatile, too, as the seasonings can be adjusted to make it fit whatever you're wanting to make.  I have used this basic method to make coleslaw dressing and to give a more Italian flair to my pasta salad.  No matter what you're making it for, it's all about building an emulsion.


For this batch, the seasonings I used were salt, pepper, celery seed, garlic powder, paprika and sugar.  Start out by mixing together the yolk and dry ingredients, and then add the vinegar.  I have moved on from a whisk to a hand mixer, mainly because I was never able to whisk vigorously while slowly drizzling the oil into the yolk.


Once that mixture is combined, start adding the oil a few drops at a time until the mixture starts to thicken.  There's your emulsion!


At this point, you can increase the flow of oil slightly, though still slow, and continue mixing until all the oil is incorporated.


There you have it!  Homemade mayo!  Leave at room temperature for an hour and then keep in the refrigerator for up to a week. 

Mayonnaise

Ingredients
1 egg yolk
1 teaspoon kosher salt
1/2 teaspoon ground black pepper
1/2 teaspoon garlic powder
1/2 teaspoon celery seed
1 pinch paprika
2 pinches sugar
1 tablespoon white wine vinegar
1 cup oil

Directions
Whisk together egg yolk and dry ingredients.  Then mix vinegar into the yolk mixture. Continue to mix and start adding the oil a few drops at a time until the liquid seems to thicken and lighten.  Once you have formed the emulsion, increase the oil flow to a constant, thin stream. Continue mixing until all of the oil is incorporated. Leave at room temperature for 1 hour then refrigerate for up to 1 week.

05 February 2013

Alton Brown's Fried Chicken

0 remarks


Fried chicken is hard to get right, at least in my experience.  I don't remember the first time I attempted Alton Brown's fried chicken, but the Good Eats episode that featured the recipe, "Fry Hard II: The Chicken", first aired on April 25, 2001.  I imagine that I tried to make it shortly after, since I was trying just about every new Alton Brown application back then.

The road to success was daunting, and it was the breading that gave me fits.  It was hard to get it just right, and I was inconsistent at best.  Sometimes it would be perfectly crispy, golden brown and delicious.  Other times, the breading would be soggy and greasy, or sometimes almost mealy with too much flour.

The chicken was always delicious, though; tender, juicy and flavorful.  The spices are just right, too.  One teaspoon of cayenne pepper may seem like a lot, but it adds just the right amount of heat.  It really is subtle, because the kids eat it up, too.  So, the struggles I had with the breading was made up for by the chicken itself.  But, when I got the breading right, it really sent it over the top. 

I don't know what led me to try it, but a couple years ago, I finally found the secret to the perfect breading.  A brown paper bag.  By putting the flour and chicken in a brown paper bag and shaking it up, it created a perfect coating of flour on the chicken.

Since I have adopted this method, I get perfect fried chicken every time.

Fried Chicken
Printable Recipe

Ingredients
1 broiler/fryer chicken, cut into 8 pieces
2 cups low fat buttermilk
2 tablespoons kosher salt
2 tablespoons Hungarian paprika
2 teaspoons garlic powder
1 teaspoon cayenne pepper
Flour, for dredging
Vegetable shortening or oil, for frying

Directions
Marinate the chicken pieces in buttermilk and refrigerate for 12 to 24 hours.  Add enough shortening or oil to come 1/3-inch up the side of a 12-inch cast iron skillet. Heat oil to 325 degrees.

Drain chicken in a colander or on wire rack. Combine salt, paprika, garlic powder, and cayenne pepper. Season chicken with this mixture liberally.

Add flour to large paper bag then add all the chicken.  Shake the bag to thoroughly coat the chicken.  Then remove the chicken from the bag and place skin side down into the pan. Put the thighs in the center of the pan, and breast and legs around the edge.

Cook the chicken until golden brown, approximately 10 to 12 minutes per side; the internal temperature should be right around 180 degrees.  Drain chicken on a rack over a sheet pan.

05 August 2012

IU Quilt Template

5 remarks


With college basketball season fast approaching, I would like to have something warm and cozy to wrap up with when the Hoosiers hit the hardwood.  I doubt I will be snuggled up in the quilt while they are playing (I am usually at the edge of my seat) but it will be nice to have while I am basking in their victory.

I considered several options for this quilt, but I think I have settled on a design.  I contemplated a cream logo with a crimson background, but I think the crimson logo with cream background looks better.  I also thought about what the back of the quilt should look like, and I still don't know if I have decided. 

I wanted to buy an IU pattern fabric for the back, but learned that it doesn't exist.  A solid cream or crimson back was also a consideration.  What I am leaning towards right now is a cream and crimson candy stripe back similar to the IU warm up pants.  Time will tell.  For now, it's time to start cutting!

LinkWithin

Related Posts with Thumbnails