23 November 2010

Chicken Stock

1 remarks
I've been saving chicken carcasses for a while (what a weird statement) in hopes of one day making my own chicken stock.  My biggest issue was trying to find a time where I could be home all day to keep my eye on it.  That day finally came, so I took my carcasses out of the freezer and got to work.

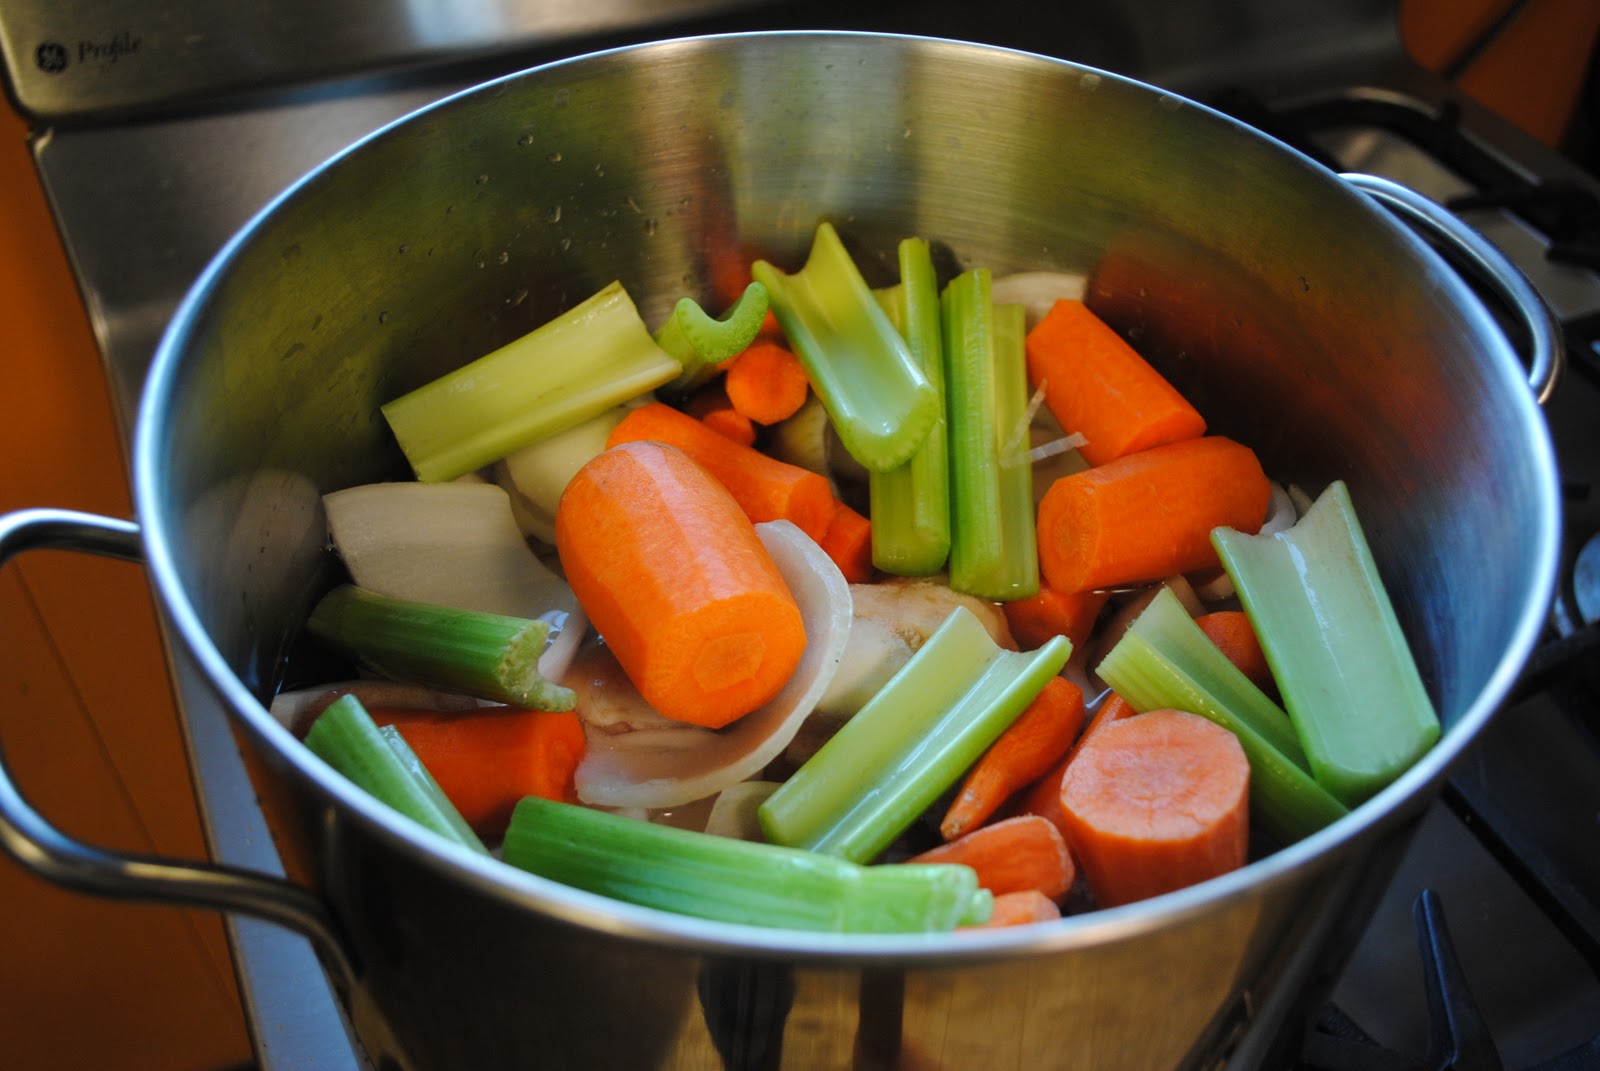
I put all my ingredients in a 12-quart stockpot and brought it up to a boil.  I didn't really take that many pictures because most of the steps look the same, for the most part.  What I wish I could share is the amazing aroma the filled the house.  It reminded me a lot of Thanksgiving, only about ten times better.


After simmering for about 6 hours, I strained out the solids and packaged the stock in some 1-quart Ziplock containers.


It was really quite easy to make the stock, albeit a little time consuming.  Plus, it is really cost effective, since a quart of good quality chicken stock at the grocery store usually costs about $3.50.  The question is, what is the first thing I should make using my own chicken stock?


Chicken Stock
Recipe courtesy Alton Brown
Printable Recipe

Ingredients
4 pounds chicken carcasses, including necks and backs
1 large onion, quartered
4 carrots, peeled and cut in 1/2
4 ribs celery, cut in 1/2
1 leek, white part only, cut in 1/2 lengthwise
10 sprigs fresh thyme
10 sprigs fresh parsley with stems
2 bay leaves
8 to 10 peppercorns
2 whole cloves garlic, peeled
2 gallons cold water

Directions
Place chicken, vegetables, and herbs and spices in 12-quart stockpot. Set opened steamer basket directly on ingredients in pot and pour over water. Cook on high heat until you begin to see bubbles break through the surface of the liquid. Turn heat down to medium low so that stock maintains low, gentle simmer. Skim the scum from the stock with a spoon or fine mesh strainer every 10 to 15 minutes for the first hour of cooking and twice each hour for the next 2 hours. Add hot water as needed to keep bones and vegetables submerged. Simmer uncovered for 6 to 8 hours.

Strain stock through a fine mesh strainer into another large stockpot or heatproof container discarding the solids. Cool immediately in large cooler of ice or a sink full of ice water to below 40 degrees. Place in refrigerator overnight. Remove solidified fat from surface of liquid and store in container with lid in refrigerator for 2 to 3 days or in freezer for up to 3 months. Prior to use, bring to boil for 2 minutes. Use as a base for soups and sauces.

15 November 2010

The Item Block

2 remarks
So, Ari walked into his room the other day to find an item block hovering in the air.


Naturally, he did what any red-blooded American boy would do when faced with the same situation.


He punched the bottom of it.  I mean, who wouldn't punch the bottom of it?  There could be so many amazing things inside.  Would it be a coin?  A super mushroom?  A 1-Up?  A star?  As it turns out, it wasn't any of those things, but he was quite pleased regardless.


It was our latest reward from Club Nintendo!  A figurine featuring Mario, Luigi, Toad, Peach, Yoshi, Bowser, and a Goomba.  We registered enough games last year to reach platinum status with the club, which will probably never happen again since we registered four years worth of games to get there.  They sent this to us for free, and we didn't even have to use any of our reward "coins" to get it.  What a sweet deal, huh?  I can't think of a nicer reward, especially since Ari has it proudly displayed in his bedroom.

03 November 2010

Apple Crisp

3 remarks

Warm, crunchy, sweet, and comforting.  Apple crisp warms the soul and is truly a celebration of the season.  I wouldn't go as far to say I like apple crisp more than apple pie, but it is right up there in terms of culinary autumnal delights.

Apple crisp comes in so many different forms and just about every recipe I found for it is different, sometimes drastically.  From the amount of crisp topping, to whether or not to use a thickening agent in the apple mixture, the preferences vary greatly.  Such differences are what inspired me to come up with my own apple crisp recipe.

I prefer my apple crisp to have a thicker crisp topping, but not too much to overpower the apples.  The topping for my apple crisp is sweet and crunchy with just a little salt to enhance and bring all the flavors together.  I like to use regular rolled oats because I think they make the crisp look and taste better.

I add a thickening agent to the apples, in this case tapioca flour, because I don't like the apple juices to be runny.  The apples are seasoned in much the same was as the filling in Nonna's apple pie, with the addition of lemon juice and apple cider.  The apple cider adds a depth of flavor, and the lemon juice adds a bit of tartness that counters the sweetness of the topping nicely.

I've been tinkering with a recipe to call my own for the last couple apple seasons, and I am very happy with the end result.  This is truly my idea of what apple crisp should be.


Apple Crisp
Printable Recipe

Ingredients:
4 pounds Jonathan apples (or your favorite baking apple)
1 tablespoon lemon juice
2 tablespoons apple cider
1/3 cup granulated sugar
2 tablespoons brown sugar
2 tablespoons tapioca flour
2 teaspoons ground cinnamon
1/2 teaspoon ground nutmeg
1/8 teaspoon ground ginger

Topping:
1 cup flour
1/2 cup sugar
1/2 cup light brown sugar
1/2 teaspoon kosher salt
3/4 cup rolled oats
3/4 cup (1 1/2 sticks) unsalted butter, diced and chilled

Directions
Preheat the oven to 350 degrees F.

Peel, core, and cut the apples into small wedges. Combine the apples with the lemon juice, cider, sugars, tapioca flour and spices. Pour into a 9 x 13 baking dish.

For the topping, combine the flour, sugars, salt, oatmeal, and cold butter in the bowl of an electric mixer fitted with the paddle attachment. Mix on low speed until the mixture is crumbly.  (This can also be done by hand or with a fork).  Scatter the topping evenly over the apples.

Place the crisp on the middle oven rack and bake for 1 hour or until the top is lightly browned and the apples are bubbly.

31 October 2010

0 remarks

HAPPY HALLOWEEN

30 October 2010

All Hallows Eve Eve

0 remarks
Halloween is almost upon us, so I would like to direct you to Ditalini Press where this months topic is "Scary Stories to Tell in the Dark."  Included is my own original scary story "Pink Carnation."

Perhaps you'll find a new bone-chilling tale to tell around the campfire.  Plus, if you'd like to get in one the spine-tingling action and submit an original ghost story, just leave a comment in any of the posts, and we'll be happy to accommodate.

We've been busy getting ready for the night by making costumes and carving pumpkins.  Here's a look at the kids with all of our pumpkins.


Now with the lights off...

Spooky!  Carving was a lot of fun this year, especially because Ari drew the face on his pumpkin and I carved it with his supervision; as to not misinterpret his vision.  His is the second one from the left in the picture, the one with the wide eyes and crooked smile.  It looks really neat with the lights out.  Stay tuned for pictures of the kids in their costumes.  Here's hoping everyone has a happy and safe Halloween!

25 October 2010

Choked Up

4 remarks

The artichoke I have been watching is really starting to take shape.  I have been tempted to harvest it, but I'm going to give it a couple more days to make sure it's really mature.  The other artichoke in the garden is starting to form as well; though, I don't know if the cold weather will catch up to it before it is able to complete the process.  Time will tell.  These artichokes are such interesting creatures.

21 October 2010

Turtle Pants

2 remarks

Ari has decided he wants to be a Teenage Mutant Ninja Turtle for Halloween; Leonardo to be exact.  So, before he could change his mind again, we went out and purchased his costume.  Not thrilled with the Ninja Turtle costumes on the market, we decided to just buy him the mask and piece the rest of it together.

We found a nice shirt to go with the costume, but the right color of green pants were hard to come by.  I figured I could make him some pants, so I bought some green fleece and went to work.  As I was making them, I envisioned the scene from the Grinch cartoon where he was making his Santa suit.  Just cutting an outline of what I wanted to make and sewing it together.  It worked quite well, for all intents and purposes, and now Ari has a pair of turtle pants.  The first article of clothing I have ever made.

Upon making this garment, even with the crude nature with which it was made, I gained a deeper respect for those who really know how to make clothes.  My cousin Eva, of Eva + Daniel fame, has just started a new blog called Belle-Mère Belle-Fille dedicated exclusively to creations made by Madame Sutter and herself.  She also has an Etsy shop featuring original clothing of exceptional quality handmade in France (and I do mean exceptional).  I am lucky enough to own something made by Eva, and it is simply wonderful.

If that's not enough, my friend from Chicago, Michelle, is launching her own clothing line called 
Dollparts; which is a clothing line made from recycled textiles.  Her clothing line utilizes eco-conscious fabrics, remaindered or discarded textiles, as well as vintage and thrifted pieces.  Michelle started a kickstarter campaign to raise funds for getting her designs into production.  It would be awesome if anyone would donate (even as little as $1) to her cause.  She only has a few days left to get pledges, so act fast!

I don't know how I got so caught up in the world of fashion, but I'm loving every minute of it!  Oh, and I'm happy I was able to make a small contribution with the turtle pants.  Who knows, they may be the next big thing!

19 October 2010

Pumpkin bread

2 remarks


I have been a baking fool as of late, taking advantage of the season's harvest.  My favorite quick bread of the moment is Alton Brown's pumpkin bread.  I am a big fan of the flavors of pumpkin bread, but I normally find it too dense and chewy.  Not AB's though, by utilizing fresh pumpkin, this bread breaks the mold and takes pumpkin bread to another level.

I have not found success using canned pumpkin when making pumpkin bread.  It never seemed to bake quite right, and the flavors fell a little flat.  The fresh pumpkin is a revelation, and lends the bread a lightness softness, and fluffiness while maintaining that wonderful pumpkin flavor.  Plus, it's really no different than shredding some carrots for carrot cake or zucchini for zucchini bread.  Definitely worth the effort.

The recipe posted below is taken from the Food Network website.  I have the advantage of also owning the book Good Eats: The Early Years in which Alton Brown shares some tips for the recipe.  In the book, the directions have you dump the shredded pumpkin onto a kitchen towel and twist into a ball to wring out as much water as possible.  As for the pumpkins seeds, also known as pepitas, be sure to use seeds that have had their hulls removed.  Do not use the unhulled seeds that come out of a standard jack-o-lantern pumpkin (a mistake I made the first time I made it). 

With the addition of those helpful hints your pumpkin bread should turn out quite delicious.  The bread is so good, you can eat it plain; though, I have been known to spread some cream cheese on a slice ever now and then.


Pumpkin Bread
Recipe courtesy Alton Brown

Ingredients
2 cups all-purpose flour
2 teaspoons cinnamon
1 teaspoon baking soda
1/4 teaspoon baking powder
1/2 teaspoon salt
1 1/2 cups sugar
3/4 cup vegetable oil
3 large eggs
1 teaspoon vanilla extract
3 cups (one pound) shredded fresh pumpkin
1 cup toasted pumpkin seeds

Directions
Preheat the oven to 325 degrees F.

Sift the flour, cinnamon, baking soda, baking powder, and salt together.

In a separate bowl, mix the sugar, vegetable oil, eggs, and vanilla. Combine both mixtures and fold in the shredded pumpkin and pumpkin seeds. Once the ingredients are all incorporated pour into a non- stick 9 by 5 by 3-inch loaf pan. If your pan is not non- stick coat it with butter and flour.

Bake for 1 hour and 15 minutes. At this point a knife inserted into the middle of the loaf should come out clean. Cool for 15 minutes and turn out onto a cooling rack. Cool completely.

12 October 2010

Sugar Cream Pie

2 remarks

Considered an "Indiana legendary local cuisine", this pie is so delicious.  Sweet, rich, and creamy, sugar cream pie does not disappoint.  I never knew this pie was a Hoosier delicacy until I was visiting my dad in Louisville and he took me to The Pie Kitchen.  I was craving a piece of sugar cream pie and they didn't have it on the menu.  When I asked the server about it, she looked at me like I was crazy, and said she had never heard of it.  I was surprised that they didn't have it, and baffled that someone had never heard of sugar cream pie.  It was then that my dad told me that sugar cream pie was local to Indiana, so some places outside of the state may not serve it.  I realized how lucky was to be a Hoosier.

We used to buy sugar cream pies, but the pie shop where we purchased them moved and it prompted me to try me own.  I tried a couple different recipes without much success.  The flavor was where I wanted it to be, but the pies turned out runny.  I finally found a recipe on allrecipes.com that was a winner.  I have tried it a couple times with great results.  Smooth, sweet, rich and creamy with hints of vanilla and nutmeg.  A perfect autumn pie, and quite easy too!

Print Recipe

Sugar Cream Pie
Recipe courtesy Glenda Browning

Ingredients
1 prepared 9 inch pastry shell
1 1/2 cups white sugar
1/2 cup all-purpose flour
1 cup heavy whipping cream
3/4 cup whole milk
1 teaspoon vanilla extract
1/4 teaspoon ground nutmeg
1/4 cup butter, chilled and diced

Directions
Preheat oven to 450 degrees.
In a medium bowl, mix together sugar, flour, and cream. Add milk and vanilla extract, and continue to stir until mixture is smooth. Pour into pastry shell. Sprinkle top with nutmeg and dot evenly with small chunks of butter. Bake in preheated oven for 15 minutes. Reduce heat to 350 degrees and bake an additional 45 minutes.

06 October 2010

What to do with that leftover pie crust

2 remarks

With every pie crust, there is inevitably some excess dough left over after trimming the edges around the pie plate.  Now, this stuff is simply too good to just throw it away, so why not make an extra little treat with it.  When I was young, I remember Nonna rolling out the leftover pie crust dough, sprinkling it with cinnamon and sugar, and baking it.  Talk about delicious!  I have adopted this method for my leftover crust, too. 

With my last pie, I decided to try something new with my leftover crust dough.  Instead of baking it flat, I rolled the dough after sprinkling it with cinnamon and sugar.  I then cut the rolled dough into half inch rounds so they resembled little cinnamon rolls and baked them on some parchment paper.  It worked like a charm.  They pretty much tasted the same as the flat crust, but it was so fun to eat those miniature cinnamon rolls.

LinkWithin

Related Posts with Thumbnails